
Nothing Fancy Clothes Pin Bag
Like I said nothing fancy just plain little clothes pin bags done on a knitting machine. My old ones are almost gone. They held up for the longest time but then gave up, well one still is holding but not for much longer. For the store bought one I still have, I just put the larger clothes pins in and there aren't many of them.
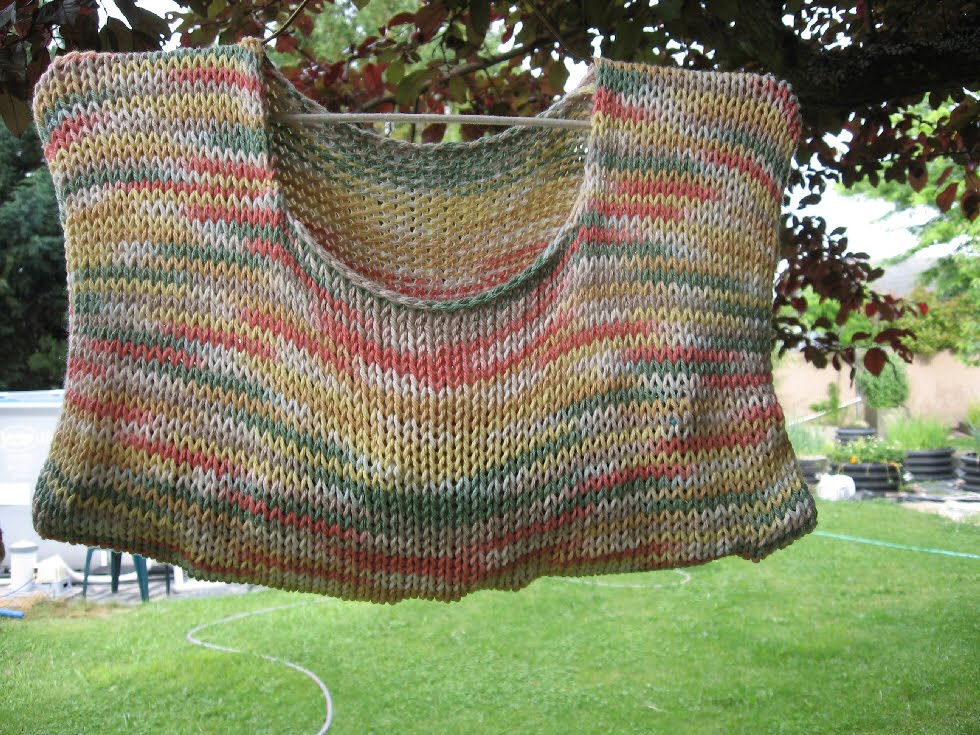
This first one I did with just knitting a rectangle. Then I cast off the center stitches for the opening, pick up stitches on one edge, knitted a row, and cast off. Then picked up stitches for the other side, and repeated the knit one row, cast off.
For the side seams I just whipped stitch them.

This second one was done almost exactly as the first till the casting off. I picked up the edges of the beginning row but knitted three rows after that pickup. Then I folded those extra rows over and seamed them to the bag body. Was experimenting to see what will hold up better with the clothes hangers I am using.
For this one I also place both edges of the sides back on the machine and knitted a couple of rows for additional strength. 
This third one I did a bit differently. Just needed to do some practice on the machine so why not. This is nothing fancy like I said, so why not play around with it.
I cast on only one side and did several rows. Then I put those needles to hold and cast on the other edge and knitted it the same amount. For the center I decided that practice manual manipulation for knitting the stitches was a good thing to do. So I did that for the side I was on, latch hook cast on the center needles, and hand knit the stitches for the other side. For some reason I have this thing about knitting sides differently so this satisfied my need to have them exactly the same.
After this is was just a matter of knitting the body. After the body was knitted took off on waste, turned it around and rehung those stitches and the beginning side stitches to finish by having the join on inside rather then outside like the other bags. This one has all the stitches cast off in one pass. Looks a bit neater this way. I thought about doing a crocheted edging around the opening but then decided not to do that. For joining the sides I did this one from the wrong side. I didn't do that with the other two. I wanted to see different looks to the bags. Just play time.
For hanging the bags I took old metal clothes hangers and bent them to fit the bags and bent the top to make it set the way I want. I really need to make one more as I have more clothes pins.
Each of these bags are wide and short in body rather then like the kind you get from the store, long and narrow. I am short, my lines are high up, this makes it easier to reach inside the bag for the clothes pins.
My husband says they look like little short sweaters with no arm holes. Well, they sort of are.
I used peaches 'n cream cotton yarn, two different bulky machines. The first bag was on the Brother KH230 machine, the last two were on the Studio Mod150 machine. The 230 is set up in my bedroom, the 150 I set up outside so I can knit out there. Love to be outside when the weather allows for it.
posted by Amoonsinger at 7:34 AM
![]()
![]()


2 Comments:
I got your name from Provo Craft, I am looking for the pattern on their informercial of the gray and blue backpack type of project and felted bag. I was curious if you were the designer of those projects?
That's very interesting. I am not at all sure why Provo Craft would be giving out any info for me. I have not done any patterns for them.
I haven't even seen the pattern you are looking for. Sorry, but I just don't know that one. I haven't even seen their infomercial.
Post a Comment
<< Home