Saturday, June 17, 2006

Single Rake Bind off

Last night feeling tired but not sleepy I went to lay down with the TV on, but it was boring. So I grabbed out the book I bought, Mary Thomas's Knitting Book, and went to take a better read over the parts on loom knitting. Boy did I get a supprise. There is some great information, even if you have to dig a bit to get it. By dig, I mean my brain has to sit up and really take notice, not just skim over it.

For instance, even though I now know this, the book explains how to do a cord on two pegs of a loom. Neat for when you want to make something like a strap, tie back or something of that nature. If you use something besides yarn then you can get a much stronger strap.

There is a small section in the book that talks about increasing and decreasing on looms, even about how you can transfer stitches from a single rake round to a double rake to continue decreases for like the top of a hat, but for myself, I did learn this is not quite as easy as the section in the book makes it sound. It also talks about how if you are using the e-wrap stitch, you can change to the "flat", or knit stitch at the top and thus decrease the area as the knit stitch creates a much tighter weave that decreases the size of the piece.

Mary doesn't call the stitches by the names we currently use so I had to figure out just which stitch she is talking about by reading how the stitch is done. Where we call it wrapping she calls it winding the pegs. Where we have learned the "flat" or knit stitch she calls this the Plain or Closed Stitch which makes a fabric simular to an ordinary Stocking Stitch. The winding (wrapping) that we know as the e-wrap she calls the Raised Crossed Stitch which makes a fabric simular to the Crossed Stocking Stitch.

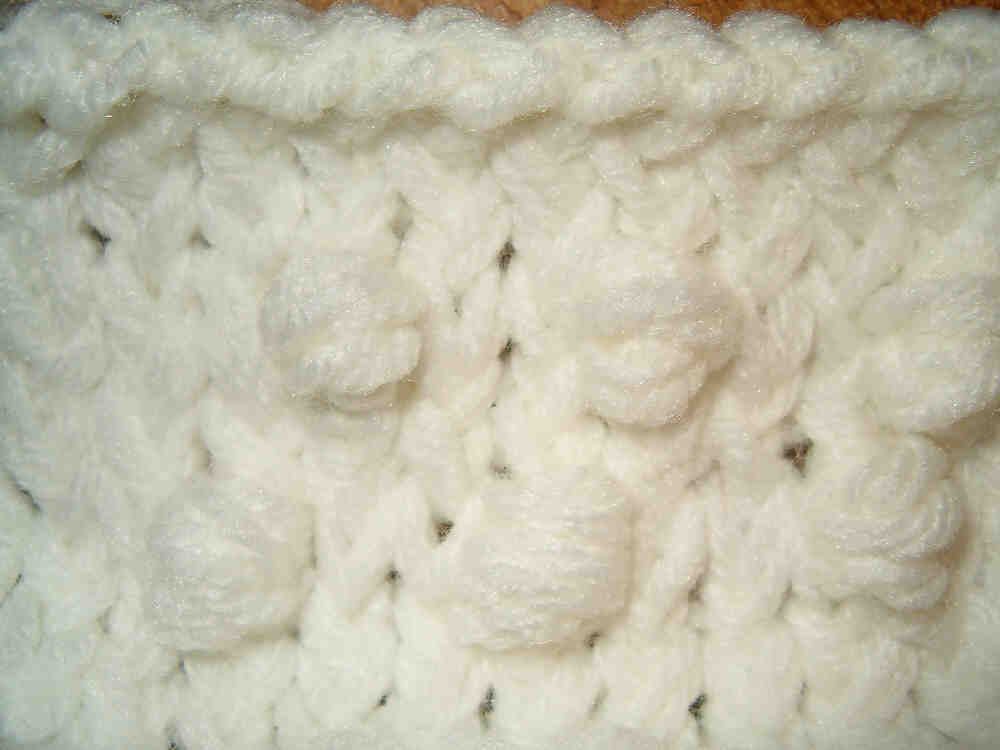
On a double rake we know a stitch called the figure eight. Mary talks about this stitch calling it the Rib In Close Stitch. I had already figured out that the figure eight is an e-wrapped stitch that forms a knit on the one side while doing a purl on the other side. You just cannot tell it that much because the stitches lay so close to each other, but try doing the figure eight skipping every other set of pegs. You will get an entirely different look to your pieces.

So if you wrap the doing the Rib In Close Stitch but do it e-wrapped or figure eight style you have a Rib In Close Raised Crossed stitch. You can do the Rib In Close Stitch by using the single stitch and have a plain stocking stitch. She shows both of these. She even has one she calls Ribbing (2 & 2) which I illustrated earlier with the pictures called K2P2 no e-wrap. On this one you are wrapping around two pegs at a time top and two pegs bottom.

Mary continues to discuss a little about color changes for vertical and horizantal stripes and then has a little section on open patterns. She says these types of stitches are good for doing something like curtains and resemble dropped stitch patterns. This section my eyes began to blur on so I have left it for another reading.

Now on to what has become at this point the best thing I learned from this reading. A new to me cast off. Oh a nice new to me cast off. This one I oosted a little about earlier today on a group and rather then try to write it all out again, I just am pasting it here:

"I just tried a new to me method of removal from a single rake, be itround, straight or oval and I like it.I say new to me because I haven't tried this before but it is not new. It came out of the Mary Thomas's Book of Knitting first published in the 1930's. She taught it this way.

At your first peg, she says peg A, where the yarn coming from the ball/skein is, wrap peg B and knit it off.Now take the stitch on peg B and move it to peg A. Knit off the bottom stitch and move the loop back to peg B. Now wrap and knit off peg C. Move C's loop to peg B and knit off. Continue in this manner till the last peg is knitted off and you have only one loop left. Remove the last loop cut and finish off.

Now I have tried this twice. The first time I snugged the stitches down as I went. Oh what a tight edge. Nice and firm and very good looking, but since I wanted something a little looser, I did it again.

The second time I didn't snug each stitch down so tight, instead leaving it a little loose on the peg. Oh it is beautiful and no crochet hook to mess with, easy and quick. I like how it looks along with the crochet method of cast on or the long tail caston (I think the long tail is easier). I have found my method of removal for the single rake. Up to this point I have not been extremely happy with any of them. The only thing I would suggest on this one is to make sure the stitches for the last row before removal are not loose, well the end ones. I didn't and I have one end stitch that is way too loose, my fault.

Oh I should have gotten into this book a bit sooner. I wouldn't have been struggling with this for so long."

Along with the loom knitting sections, Mary discusses a little loom called a Loop Knitting Loom that one is very neat. Then she has some on a peg knitting loom which when I read it I realized that this is a loom to create what I just learned as finger knitting. Way cool the neat things I have learned lately. This one is like the little stick knitting loom that provo is coming out with.

Labels:

Monday, June 05, 2006

Well, it didn't work out as planned. I was suppose to baby sit today but it had to be here at my home. My youngest son doesn't have a car and I must take him to school. Babysitting was to start at 9am and school starts at 11am. Things got messed up.

The DIL got up and went to work. They only have one car so no way to bring the kids here and the carseats were in the car so no way for me to get them and bring them here. So I did a work day at home instead. Yea, lots of fun that.

This past Saturday I received a package from a friend. She had been given some things in in them was a tatting needle, size 5, and three tatting books. One of the books is the DMC Festive Tatting. I didn't have that one. The other two books are by Barbara Foster for needle tatting. There are two books named "Needle Tatting Book 1" and "Needle Tatting Book 2". I cannot be for sure yet as I haven't pulled out my Learn to Needle Tat Step By Step, but I think these two books are that same book combined. They are much older then the book I have so it is quite possible that Ms Foster combined the two into one. The pictures are all black and white except for the front cover ones.

I am working motif #3 out of the DMC book but boy what a mess that one is. I had to use the picture to translate as the entire thing seems to read wrong. Twice I have had to do the second inner motif over. Too bad, I do hope that some of the others are not as badly written. At least you get a general idea of ring sizes and the picture can help from there.

Ok back to work. I have bunches more to do tonight.

Labels:

Saturday, June 03, 2006

Bobbles on a round loom


Well the first picture is not so great but at least you can see the bobble that I tried to get really close to. These are bobbles knitted on a flat piece on a round knifty knitter blue loom.

Ok how did I do this. It was actually very simple. I wrapped and knitted off right to the point where I wanted a bobble. Then I tried a couple of different things. First on the bottom rows you see I would wrap the peg at the top, above the current stitch. Then lifting that bottom stitch I reached up with the pick and pulled that new wrap to the bottom of the peg. I then did this same thing four more times always keeping the main stitch at the top of the peg. Now knit off those five you just pulled below, right over the top of that stitch you pulled them through. Now you have five stitches sitting on the one. One bobble made.

For the top row I tried something a little different. I knitted to the point of placing a bobble. This is the same as above. Wrap the pegs up to the bobble and knit them off. Now wrap the peg that you want the bobble on five times. Lift the bottom wrap, this is the one that was already on the peg, pulling it a bit to lift it over the five wraps you just did, placing it at the top of the peg above your five new wraps. Now knit off those five new wraps over the top of that stitch old stitch you lifted to the top of the peg. One bobble made.

One difference that I noticed in these two is that the second wrap will take some adjustment of the bobble when the knitting gets long enough to get to it. It is a little bit more compacted and you could leave it that way but I wanted it to be a bit fluffier so I just used the pick to straighten the wraps up.

Ok one more thing to do on the round loom for accent. I hope someone has fun with this one. Now Isela has made bobbles with different method, so go check out her blog to see how she did them: http://isela.typepad.com/

Labels:

Thursday, June 01, 2006

The Zig-Zag Knitting board Stitch

Not much time this morning. It is payday again. So I have all that do this, get this done, have to finish that, then I can get numbers from payroll and do checks. With everyone standing around (well working while standing around ROFLOL) bugging me about when checks are going to be done. Sigh, one more time. Wow, how did it get here so fast.

I started to play with the zig-zag stitch last night. I thought I had it before when I helped someone on it, but I must have lost it. Well, I am lost more and more these days, must be a getting older thing.

Anyway, I tried and tried and that first row for the zig-zag just wasn't coming out right. So I went to the computer with my board and popped in the DVD. After following that DVD all the way through that first row, I was still wrong. So rip it out and start again. I did this several times before it dawned on me that the problem wasn't me, it was the instructions, written from the knittingboard site and the DVD. Duh, how can this be worked if I don't understand in the first place.

The directions say to leave the thin side thin and the thick side thick. The DVD shows wrapping the first row of the zig-zag then tells you that thin and thick stuff. Then it proceeds to tell you to knit off the two bottom stitches on the thin side to leave it thin. Well, bummer I didn't have two stitches. This caused me to re-wrap and re-wrap to try to see what I was doing wrong to not have two stitches to knit off.

I was getting quite frustrated trying to figure out why I was making such a mistake. Where was I going wrong? I couldn't find it. So I just decided to knit off that row and try the second. I did.

Oh boy I wrapped that second row and went wow, there's the two stitches on the leave it thin sides. Ok now I understand. Even though the DVD tells you to knit off two stitches on the first row of the leave it thin, there are not two stitches to knit off. There is only one for the first row.

You see the leave it thick is the side that will next be your leave it thin. You started with a base and on that base there is one stitch per peg before you begin your first row of the zig-zag. So you cannot possibly have two stitches for the leave it thin pegs on the first row. The leave it thick has your peg wrapped with three stitches. You knit off one of the three on the leave it thick. So the next row, row 2 and all others, when wrapped has the leave it thin side on the pegs that were the leave it thick on the row before. Now since you only knitted off one wrap you have two left on that peg, and the second row now has three stitches on the leave it thin pegs. Now you have two stitches to knit off for the leave it thin and the leave it thick.

What a mess. Just a simple little mess up in that DVD was driving me crazy. Funny I don't have a very long drive to get to that point so I got there quickly. Even the instructions from the website do not explain this little point of only one stitch on the thin side to knit off for the first row. Such a small detail to leave such a mess in learning. A lesson to remember when I am trying to help someone.

I am now several inches into that swatch I am playing with. It really is a simple wrapping method. Then once you have learned to see the leave it thin and leave it thick pegs, it becomes quite quick to work with. It is also a very nice looking piece. The slanting of the stitches is quite pretty, and the swatch is fairly thick. Oh I should have said, (don't leave anything out), I am working with two strands of red heart worsted in white on a large gauged scarf loom from CinDWood Crafts (see sidebar for link).

A long, long time ago my daddy said "Don't believe everything you see or read, as that might be only part of the whole." Boy I think he meant this one as the written and the seeing was only part of the whole. A fine example of how leaving a little part out can spoil the whole thing and make it not work right.

Ok off here and back to the work thing. I took way too long for this little break as it is.

Labels: